Although clicking noise when the truck is off isn’t necessarily a sign of a ticking time bomb, it’s still cause for concern, indicating potential issues that should be addressed without delay.
That noise often means some of your components have gone off the rails, and you should take care of them ASAP.
I’ll tell you where all this clicking noise in your F150 comes from and how to get rid of it. Without further ado, let’s get started!
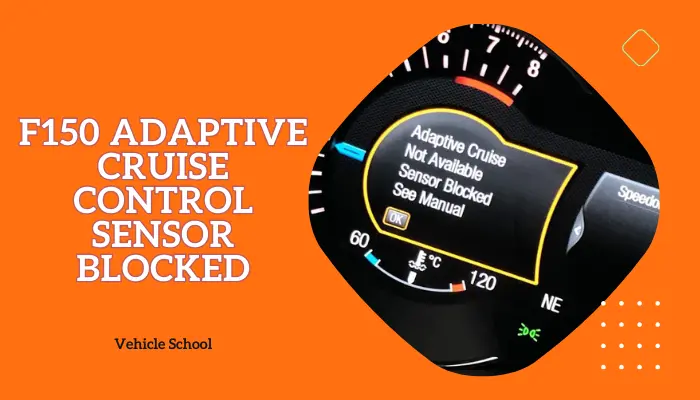
Why Is My Ford F150 Making a Clicking Noise When Off?
Here are the reasons why your Ford F150 makes a clicking noise when it’s off:
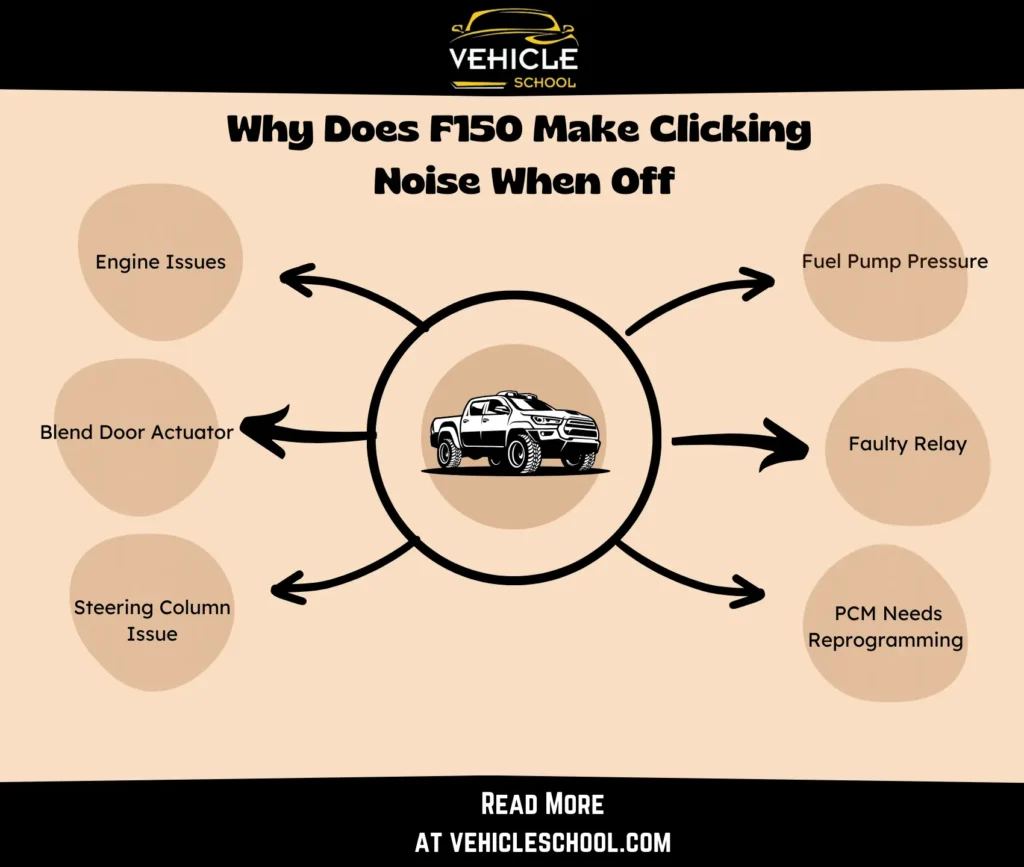
1. Excessive Fuel Pump Pressure
Excessive pressure in the fuel system leads to fuel injector leaks, resulting in rapid clicking sounds even when the engine is off.
This happens when the fuel pressure regulator fails to maintain the correct pressure.
Other symptoms of a leaking fuel injector also include a strong fuel odor, rough idle, poor throttle response, stumbling during acceleration, and bad fuel economy.
2. Faulty Relay
A malfunctioning relay, responsible for controlling components like the fuel pump, can cause repetitive clicking noises as it engages and disengages.
This typically occurs due to wear and tear or electrical issues within the relay.
3. PCM Needs Reprogramming
The Powertrain Control Module (PCM) is the brain of your vehicle, controlling various functions, including the fuel system.
If it has corrupted software or requires reprogramming, it can cause irregular electrical signals, leading to clicking noises.
4. Engine Issues
Clicking noises can also be attributed to engine problems such as low oil level or pressure, issues with the ignition system, or an exhaust leak.
Low oil level or pressure can lead to lifter ticks, while problems in the ignition system can cause spark knocks, both of which produce clicking sounds.
An exhaust leak near the engine can also result in clicking as the metal components cool after the engine is turned off.
5. Gears In Blend Door Actuator Is Broken
Clicking noises from the dashboard, especially around the temperature control, fan, or AC cluster, might indicate a broken plastic gear inside the blend door actuator.
This component, located in the dashboard area, controls the direction of airflow and temperature.
When the gear breaks, it creates a clicking noise, especially when adjusting temperature or fan settings.
6. Steering Column Issue
A loose connection within the column, an insufficiently locked steering wheel, electrical problems near the fuse box, or faulty components within the steering column can all lead to clicking sounds.
These noises often occur due to wear, electrical anomalies, or poor connections within the steering column.
How To Solve F150 Ticking Noise When Off?
Now, let’s go through all the fixes for the Ford F150 making clicking noise off:
1. Fix Fuel Pump Pressure
- Pull the fuel pump relay from the fuse block.
- Start the vehicle and let it run until it runs out of fuel, relieving pressure.
- Locate the fuel pump switch (inertia switch), usually behind or on the kick panel.
- Disable the switch to stop fuel flow and depressurize the system.
- Check for fuel leaks around the fuel injector rail. The next five steps only apply if the body of the injector isn’t leaking.
- Turn off the car if a leak is found. Remove the fuel pump fuse and absorb the leaked gasoline with a cloth.
- Disconnect injector wiring and remove fuel rail bolts, releasing injectors held by O-rings.
- Replace the upper and lower O-ring seals. Soak injectors in carburetor cleaner, rinse, and dry with compressed air.
- Install new O-rings, coat injectors with petrolatum, and reattach them to the fuel rail.
- Reinstall the fuel pump fuse, start the engine, and check to see if there are still leaks.
2. Replace The Fuel Injector
In case the earlier steps didn’t work, this is another thing you can try. Here’s how to replace the fuel injector in an F150:
- Remove the fuel pump fuse and crank the engine to release fuel pressure.
- Loosen the clamps and remove the silencer from the intake for better access to the fuel rail.
- Unplug the injector and remove the retaining clip. Twist and pull out the old injector.
- Lubricate the O-rings on the new injector with fuel, then insert and secure it into the fuel rail.
- Apply brake parts cleaner to the O-rings on all injectors for lubrication. Push them into place and properly seat them.
- Reattach the silencer, securing it with bolts and clamps. Reinstall the fuel pump fuse.
- Prime the fuel system by turning the key on and off a few times.
- Start the engine, check for leaks, and take the vehicle for a test drive to ensure proper functioning.
3. Fix The Faulty Relay
- Find the fuel pump relay; the car’s manual will provide specific information about the location.
- It might also be labeled on the fuse box cover. Open the fuse box in the engine compartment. Look for a diagram on the inside cover or nearby that indicates the position of the fuel pump relay.
- Look for damage or loose connections. Repair any issues found.
- Strip, reconnect and insulate damaged wires securely.
- Check for wear, burns, or bent pins. Clean or replace the connector if damaged.
- Examine the relay for burned contacts. If damaged, replace the relay.
- Carefully pull out the faulty relay from its socket. Use pliers if needed.
- Obtain an identical replacement relay from an auto parts store.
- Carefully insert the new relay into the socket, ensuring it fits snugly.
- Double-check all connections for security and proper insulation.
- Start the car and listen if the clicking noises have ceased.
4. Reprogram The PCM
- Ensure you have a PC with an internet connection, a Ford-approved J2534 tool, and a Ford module programming application subscription.
- Connect the tool to the vehicle’s DLC (Diagnostic Link Connector).
- Resolve any issues that might have caused damage to the original PCM. Perform the necessary diagnostics.
- Attempt to communicate with the vehicle using the tool.
- If the original PCM is communicating, inhale the As-Built data and store it in the tool.
- Choose “ALL OTHER” from the vehicle list.
- Enter data from the old PCM label (such as the Tear Tag number) to identify the vehicle.
- Input the VIN and mileage of the vehicle for positive identification.
- Follow the prompts to replace and program the new PCM, ensuring correct calibration and parameters.
- Perform any required PATS system setup if the vehicle is equipped with one.
- Clear any diagnostic trouble codes that may have been set during programming.
Software repairs are easier to do than hardware ones, but if you’re not sure what to do, here’s a video to help you get started:
5. Fix Issues Within The Engine
- Park your car on a flat surface and let the engine cool down.
- Locate the oil dipstick, pull it out, wipe it clean, reinsert it, and pull it out again to check the oil level. Add oil if it’s below the recommended level.
- Look at the ignition system. Check the spark plugs.
- If they are covered in oil or look damaged, they might need replacement. Spark plugs are relatively easy to replace with a socket wrench.
- Inspect the spark plug wires for any visible damage. If you find any issues, they should be replaced.
- Check the distributor cap and rotor for wear and tear. Replace them if necessary.
- Listen for hissing or tapping sounds near the engine or underneath the truck. This could indicate an exhaust leak.
- Inspect the exhaust manifold and pipes for visible signs of damage, such as rust or holes.
- If you find a small hole, you can patch it temporarily with an exhaust repair kit.
| Note: If the oil level is fine and you’re still having issues, it might be a problem with oil pressure. In that case, it’s best to consult a mechanic, as it could indicate a more serious problem. The same applies if you spot a larger hole. |
6. Fix Blend Door Actuator Issue
- Remove any panels, screws, or trim to access the blend actuator.
- Once the actuator is exposed, locate the broken plastic gear. See if it’s visibly cracked or damaged.
- If it is, disassemble the actuator, and note the position of other gears and components. Take pictures for reference.
- Replace the broken gear with a new one of the correct size and type, using the needed tools or adhesives.
- Put the actuator back together after properly aligning the gears and components. Tighten any screws or fasteners to secure the assembly.
- Before reinstalling the actuator, connect it to a 12V power source to test its movement, ensuring smooth operation without unusual noises.
- For the replacement of the whole actuator, redo the first three steps.
- Carefully detach the old actuator from its mounts.
- Align and secure the new actuator, ensuring proper blend door shaft connection.
- Plug in the wiring, and reconnect the battery. Reinstall panels, screws, and components.
- Test the HVAC system thoroughly, checking temperature and fan settings to ensure it’s working smoothly without any clicking noises.
7. Resolving Problems Within The Steering Column
- Confirm where the clicking comes from by moving the steering wheel and inspecting the column.
- Examine wires and components for looseness. Tighten any loose connections securely.
- If the wheel moves excessively, tighten the adjustment bolts according to the manual.
- Look for damaged fuses or wires near the fuse box. Replace faulty fuses and inspect the wiring for wear.
- Test turn signal, ignition switch, and clock spring if you suspect them.
8. Inspect And Fix GEM Module Issue
- Disconnect the battery for safety.
- Access the fuse panel by removing the cover with a screwdriver.
- Inspect for water damage and dry the area.
- Apply silicone sealant if there’s a leak, following the product instructions.
- Identify and replace faulty relays, consulting your car’s manual for locations.
- Reassemble the cover, reconnect the battery, and charge it up afterward.
- Turn on your f-150 to check for any clicking noise and test other electrical components.
Do note, these fixes will address the clicking noises. If you’re dealing with humming and grinding noises, that’s an entirely different thing.
FAQs
Can a dead battery cause Ford F150 clicking noise?
No, it can’t. If some noises are coming from the front of your truck, it’s likely the fuel pump, relay, or some of your truck accessories.
What are some maintenance tips to avoid the issue of clicking noise when the F-150 is off?
To prevent clicking noises in your F-150 when it’s off, keep the fuel system in check, inspect and replace relays, and maintain steering components.
Is it normal for a 5.0 to tick?
Yes, it is. According to a TSB by Ford, certain 2011-2019 Mustangs and F-150s with a 5.0L engine might make a ticking noise similar to a typewriter after an oil change. This noise is normal when the engine is hot and at low RPMs, and it doesn’t harm the engine.
Are these the same reasons why the F-150 makes a clicking noise when parked?
Yes, a faulty blend door actuator in the dashboard or issues in the steering column can cause a Ford F150 clicking noise in an F150 when parked.
Concluding Thoughts
There you go; your Ford should now glide as quietly as a mouse through the countryside. Addressing even minor issues promptly ensures a smooth driving experience, eliminating any pesky clicking noise while driving.
A Ford F150 clicking noise might not seem like much, but it can grow into bigger problems if left unattended.
Your awareness and proactive approach can save you money and the hassle of dealing with major repairs down the road.
That’s all for this post. Enjoy not being frustrated by all the extra noise, and stay safe.