If you’re experiencing Ford F150 4 wheel drive problems like getting stuck in 4-wheel drive mode, you’re not alone. I’ve been there too.
From malfunctioning vacuum switches to solenoid valves, the reasons behind this issue can be puzzling. However, after dealing with these challenges, I finally managed to solve this issue.
In this article, I’ll share the solutions that worked for me, to help you disengage 4-wheel drive in your F150.
Why Won’t Your F150 4 Wheel Drive Disengage?
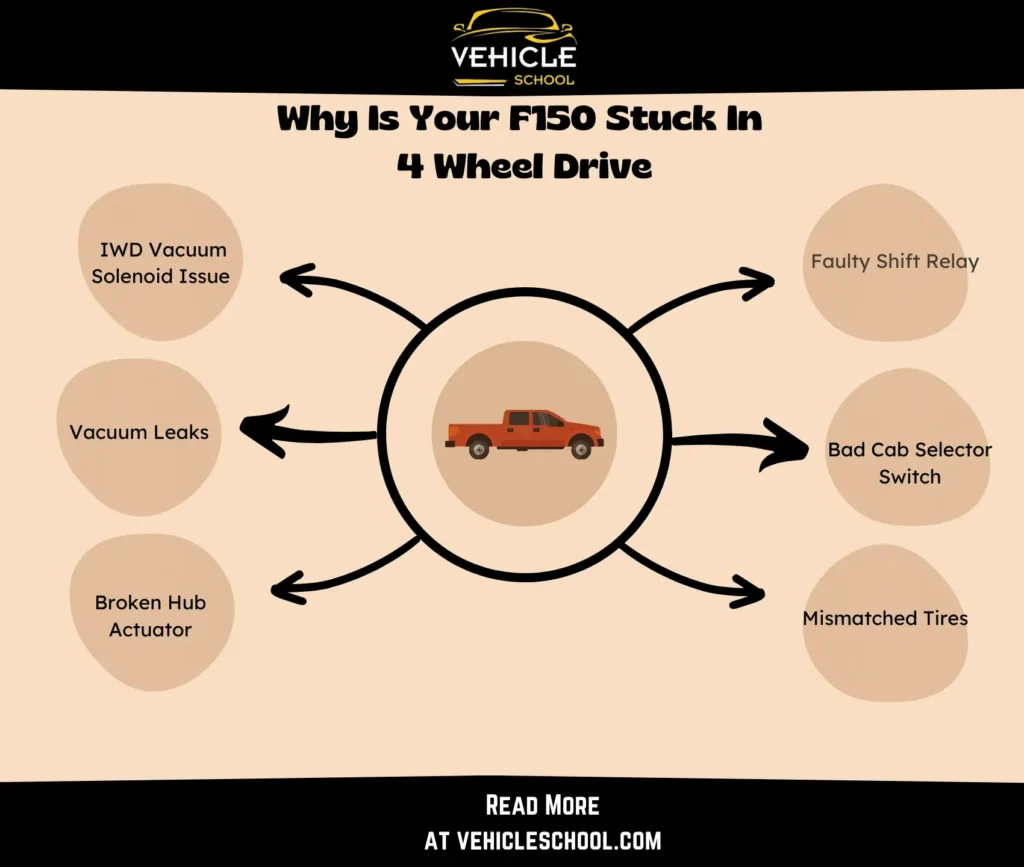
If your F-150’s 4WD won’t disengage it’s due to a bad Shift Relay, faulty Cab Selector Switch, or uneven tire wear. It can be fixed by checking/replacing these, ensuring tire upkeep, and swapping the hub actuator if necessary.
First, let’s understand why the truck is locked in this mode and then we’ll move on to the fixes.
1. The Shift Relay Is Faulty
The Shift Relay, vital for the ESOF system, can act up due to wear, electrical problems, or corrosion.
When this happens, the relay might not effectively guide the switch between 2WD, 4WD High, and 4WD Low modes.
As a result, your truck might stay in 4-wheel drive, making it tough to go back to 2WD.
2. Cab Selector Switch Has gone Bad
A faulty cab 4×4 selector switch in a Ford F-150 can keep 4-wheel drive engaged.
When this switch malfunctions, it disrupts communication between the driver and the transfer case, hindering the shift from 4-wheel to 2-wheel drive.
Common issues like worn-out contacts or a damaged circuit can cause this problem.
3. Tires Are Mismatched
Uneven tire wear messes with 4WD disengagement as it creates slight speed differences between the front and rear axles.
For 4WD to disengage smoothly, both axles need to spin at the same speed.
Mismatched tires also create tension on the transfer case gears, preventing the solenoid from releasing them and keeping them engaged.
Even if the axles seem fine, the transfer case stays that way, giving you continuous 4WD.
The same issue can happen if your tires are a bit different in size or have varying inflation pressure.
4. Issue With IWD Vacuum Solenoid
The F-150’s 4WD can have trouble disengaging when the IWE vacuum solenoid fails.
This usually happens because the solenoid wears out or gets damaged, messing up the vacuum signals needed to release the front wheels from the drivetrain.
So, even when you want the 4WD to disengage, the solenoid’s issues can keep it engaged.
5. Vacuum Leaks
If the vacuum lines connected to the Integrated Wheel Ends (IWEs) have leaks, holes, or breaks, it can mess with the disengagement process.
These lines are essential for turning the front wheels on and off in the 4WD system.
When they’re not in good shape, the needed vacuum for disengagement might not be there, and the front wheels could stay engaged when they shouldn’t.
Issues with these lines can come from wear, aging, or getting banged up by debris or off-road adventures.
6. Hub Actuator Is Broken
A faulty hub actuator in the F150 4WD system can keep the front wheels engaged, leading to handling problems and reduced fuel efficiency.
This can stem from general wear, electrical issues, or damage.
Signs include difficulty switching between 4WD and 2WD, odd noises from the front axle, or a persistent feeling of four-wheel drive.
Ford F150 4 Wheel Drive Not Disengaging: Solution
If you’re having trouble disengaging smoothly, try this quick trick before diving into more complex fixes: after making your selection, back up about 10 feet, then move forward.
If that doesn’t solve the problem, here are other fixes you can try:
1. Inspect The Shift Relays
- Open the hood of your Ford F-150.
- Locate the relay boxes on the driver’s side of the engine compartment.
- Look for a relay box containing two similar relays; it might be wrapped in black tape.
- Identify the pair of relays responsible for shifting between 2WD and 4WD.
- Swap the two identified relays.
- If a relay is faulty, cleaning or swapping it may help shift out of 4WD.
- Inspect for any rust around the relay base or connections in the relay box.
- Attempt to engage and disengage the 4-wheel drive.
- If problems persist or relays appear damaged, consider replacing them.
- After replacing or cleaning the relays, retest the 4WD system.
- Ensure smooth engagement and disengagement of the 4WD system.
2. Replace The Switch
- Use a flat-tip screwdriver to pop the panel covering the 4×4 selector switch.
- Drop down the panel or remove the wire for better access.
- On the back of the switch, locate the plastic tabs.
- Press the tabs inward to release the switch.
- Simultaneously, push the switch towards you from the back inside the dash.
- Retrieve the switch by reaching in or using a screwdriver to release the tabs.
- Disconnect the plug from the back of the switch.
- Replace with the new switch by snapping it into place.
- Reconnect the plug.
- Pop the panel back in place.
- Check if the new selector switch works right.
3. Inspect Your Tires
- Visually inspect each tire’s tread for uneven wear.
- Follow a standard tire rotation pattern or replace tires with uneven wear.
- Measure the diameter of each tire to ensure uniform sizes.
- Replace any tire significantly deviating in size from the others.
- Check and adjust tire inflation pressure using a gauge.
- You’ll find recommended tire pressure values in the truck’s manual or door jamb.
- Engage and disengage the 4WD system following the vehicle manual’s instructions.
- Ensure the 4WD system functions smoothly.
- Verify that the transfer case fully disengages during the process.
4. Replace The Vacuum Solenoid
- Locate the check valve in the F-150’s 4WD system.
- Disconnect lines on both sides, releasing some vacuum pressure.
- Connect the clear end of the check valve to the corresponding hose.
- Snap the check valve into place securely.
- Find the adjacent solenoid and release it by undoing the snap.
- Disconnect two vacuum lines, letting out any pressure.
- Remove the old solenoid.
- Slide the new solenoid onto the designated lines.
- Secure the solenoid in place to lock it back.
- Confirm proper line fittings.
5. Replace Vacuum Lines
- Make sure you have Vacuum Pump and a Z-Creeper at hand.
- Remove the old vacuum line with a trim removal tool.
- Plug the vacuum lines on both tires using suitable plugs.
- Connect a vacuum pump to the solenoid to check for leaks.
- Identify leaks by monitoring pressure drop over time.
- Order replacement parts, including vacuum lines and plugs.
- Start the replacement by breaking the line in the middle.
- Feed the new lines in both directions from the middle.
- Use the trim removal tool to progressively remove old lines.
- Connect the new lines, ensuring proper placement.
- Secure all connections and verify proper setup.
- Double-check the entire setup for secure connections.
- See if the 4WD system works correctly now.
6. Swap The Hub Actuator
This is the longest fix, so I’ll only try to sum up the most important parts here:
- Lift and secure the vehicle; remove the front wheels.
- Access the hub by removing cover, nut, and disconnecting the ABS and brake hose.
- Loosen upper control arm and outer tie rod.
- Separate ball joint, lift axle slightly, and remove the CV axle for access to the vacuum hub actuator.
- Disconnect vacuum lines and remove the actuator.
- Clean and grease the wheel hub; insert the CV Axle through the new actuator; and secure.
- Tighten screws.
- Reconnect the upper control arm, outer tie rod, and vacuum hoses.
- Verify the correct reassembly by measuring the distance and replacing the hub nut.
- Put wheels back on, lower the vehicle, and block properly.
- Check correct reassembly and cover the hub nut to finish.
For a demonstration of how this works, you can check out this video from CarParts.com:
Closing Thoughts
You might need to replace a part or two, but take it easy. Whether it’s shift relays, selector switches, or checking tires, go step by step.
Be patient, some trial and error is normal. Keep at it, and your F-150 will soon glide between 2WD and 4WD seamlessly.
If it’s still a lot of trouble disengaging or even engaging the 4WD, you could always try to set up a Ford F150 4×4 Actuator Bypass.
Good luck with the fixing!