My friend’s F150 has been giving him headaches with its Trailer Battery Not Charging issue. Judging by the Q&As I came across related to this issue, it seems to be a common one among F150 owners.
He tried various solutions found online, but nothing seems to fix his 2015 f150 trailer battery not charging problem permanently.
Given his frequent need to tow his trailer, we knew we had to find a solution soon. And so we did. Today I’ll be sharing those fixes in this article, so if you ever come up with this issue, you’ll know what to do.
What Does The “Trailer Battery Not Charging See Manual” Warning Mean?
It’s common in any F150 with a towing package to encounter the f150 trailer battery not charging issue. In short, it means the trailer battery voltage is too low for a proper charge.
Why Trailer Battery Not Charging Warning Comes On F150?
If your F150 is giving you the “Trailer Battery Not Charging – See Manual” warning, it could be due to a wet 7-pin plug, a blown fuse, wrong settings, dodgy wiring, or a software issue. Dry the plug, fix or swap fuses, double-check settings, replace connectors, or recalibrate using diagnostic tools to get rid of the warning.
Let’s start by explaining why you keep seeing this warning first and then we’ll move on to the solutions:
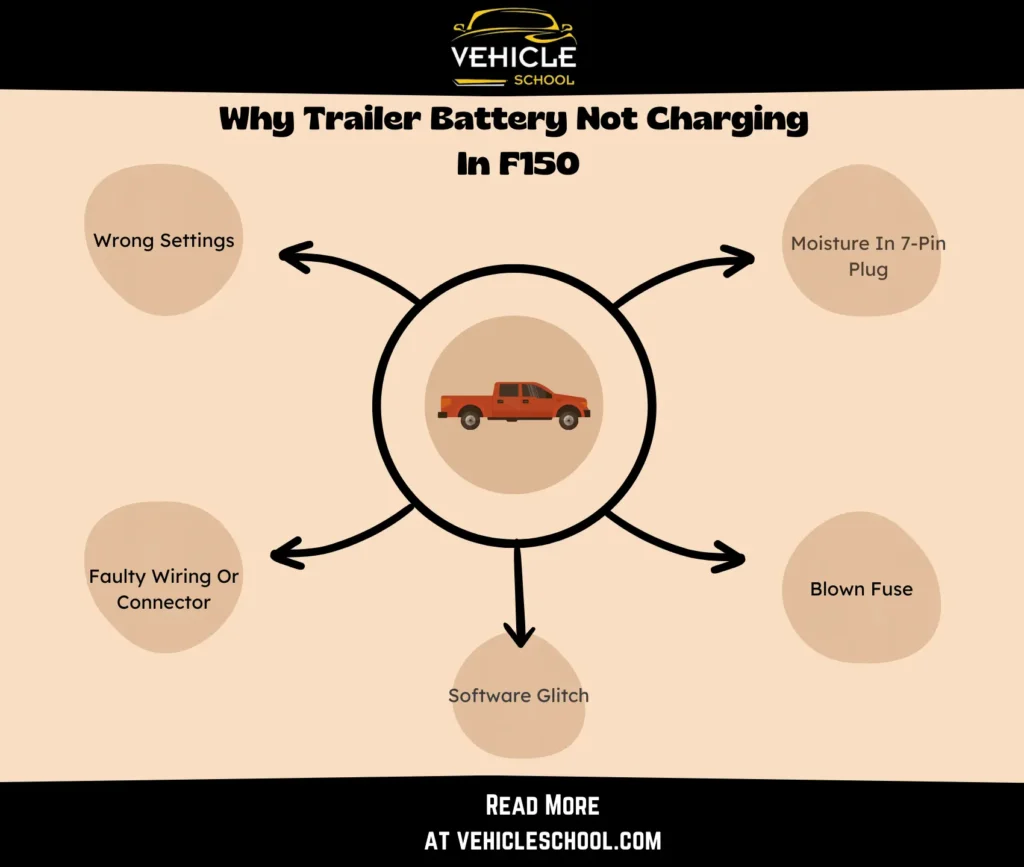
1. Moisture In 7-pin Plug
The “Trailer Battery Not Charging” message might pop up because water gathers in a spot of the outlet (usually from the rain).
This water causes a bit of resistance, making the truck think it should charge, but the resistance is less than when it’s actually charging.
This mix-up triggers the message and signals a disconnected trailer. This can also affect the dash brake controller.
2. Blown Fuse
A blown trailer fuse interrupts power to the trailer’s brakes and charging systems, prompting the warning.
You may see the Trailer Brake Module Fault warning if Fuse #91 is blown.
3. Wrong Settings
Having certain trailer settings set to the wrong option can cause the warning message to pop up.
4. Faulty Wiring Or Connector
Beyond the visible 7-pin plug, issues may arise in the wiring and connections behind and underneath the truck.
A damaged or faulty connector can also hinder the power flow to modules, causing the warning message.
This could also prevent the trailer plug from receiving power.
5. Software Glitch
Older 2015 F150 models have faulty Trailer Relay Modules (TRMS) that need to be calibrated. There was a TSB from Ford back in the same year about this.
How To Fix Trailer Battery Not Charging F150?
You can try the following to fix this issue:
1. Fix the 7-Pin Plug
- Ensure the truck is off and safely parked.
- Check for water or corrosion in the plug and its outlet.
- Wipe away any water with a dry cloth, use compressed air, or a low-heat hair dryer to ensure it’s dry.
- Add some WD-40 to the corroded areas.
- Apply a small amount of dielectric grease to the connector pins.
- Reconnect the trailer and start the vehicle to check if the issue persists.
2. Check And Replace Any Broken Fuse
- Open the floor panel in your truck.
- Start by removing and putting the fuse 36 (25 amp) back in.
- Find the trailer fuse location using your F150’s manual.
- Remove the trailer fuse carefully.
- Check the fuse for damage.
- If the fuse is fine, insert it back; the reset itself can help.
- Start the vehicle and check for the “Ford F150 trailer battery not charging” warning.
- If the warning persists, replace the fuse entirely.
3. Fix The Settings In Your Truck
Your settings are likely set to something that makes your truck think you’re hooked up to a trailer when you’re not. To get rid of the message in that case, do the following:
- Access the truck’s settings menu.
- Navigate to the trailer settings within the menu.
- Look for the option labeled “default trailer” in the trailer settings.
- Select the “default trailer” option – which normally denotes no trailer.
4. Replace The Trailer Wiring Connector
If cleaning the plug didn’t help, you might need to replace the connector itself. You can swap it out with something like a Hopkins 40974. Here’s how to do so:
- Locate the current trailer wiring connector on your truck.
- Take off any covers.
- Disconnect the old connector.
- Connect the new one to the truck securely.
- Use clips or screws to secure the new connector.
- Confirm the other end of the connector is secure underneath.
- Turn on the truck to test the new connector.
- If there’s a cover, put it back in place.
- See if you still get the message.
If that doesn’t work, check and fix any broken wires near it, that should do it if the replacement doesn’t.
5. Fix Software Glitch
Before you calibrate, make sure your IDS version is 96.01 or higher.
- Plug in the Ford VCM2 diagnostic tool into the car’s OBD port.
- Open the diagnostic software on your computer.
- Start a new session and choose “All other.”
- Wait for the tool to communicate with the PCM.
- Confirm the vehicle details displayed and select “Yes” to proceed.
- Enter the odometer value when prompted, then click “OK” at the lower right.
- Navigate to “Module Programming” from the menu.
- Choose “Module Reprogramming” from the available options and then “TRM”.
- Follow on-screen instructions and do the reprogram, then look to see if the message remains.
FAQs
Does a trailer battery charge while driving?
Yes, when you tow a trailer, your ride usually charges its battery while on the move, unless there’s a missing charger relay in the fuse box.
To cap it All
These fixes should get rid of the annoying error for you, and you can drive your truck in peace.
If none of this works, you can try going back to the fuse fix and looking up your manual for all the other trailer-related fuses. This message is usually pretty easy to get rid of, so keep the mechanic as a last resort.
That’s all. Good luck with clearing the error!