Ford F-150 headlights won’t turn off when the switch is off because of a bad switch, wiring trouble, wrong headlight settings, or sensor issues. To fix it, you might need to adjust settings, check faulty parts, replace the switch, remove sensors, or do more complex replacements for the wiring problems.
There’s a lot more to these fixes. To do them correctly and get a better insight into the main causes, keep reading my article!
Why do F150 Headlights Stay On When The Switch Is Off?
Let’s start by explaining the causes of this issue:
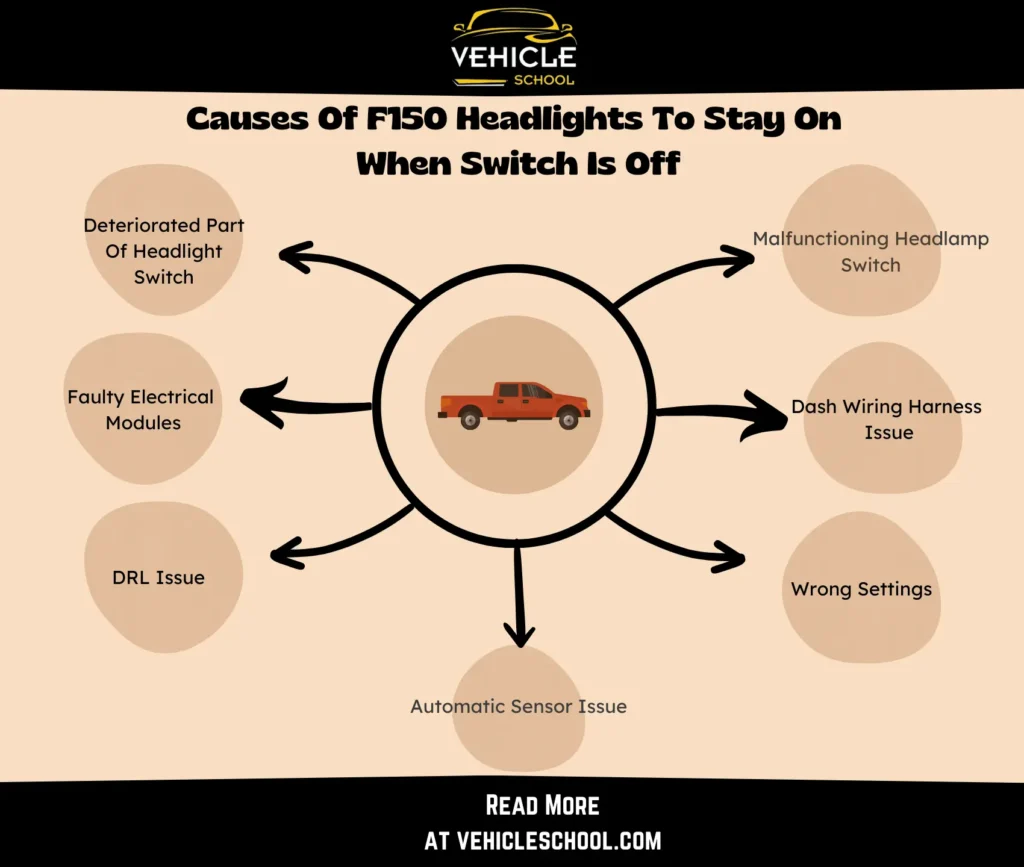
1. Malfunctioning Headlamp Switch
When a headlamp switch starts acting up due to corrosion or wear, it can cause your headlights to stay on even after you’ve switched off the vehicle.
Inside the switch, things like worn-out contacts mess up its ability to stop the power flow, which keeps the headlights on. This faulty switch can also cause your Ford F150’s lights to come on by themselves randomly.
2. Dash Wiring Harness Issue
The dashboard harness directly contributes to supplying power to the headlamps.
Problems with it, such as pinched, frayed, or shorted wires, can be causing this particular issue.
3. Wrong Settings
When the headlight dial is set to “On” instead of “Auto,” the lights might stay active even after the vehicle is turned off.
Similarly, a timer delay setting could prolong the light activity.
4. Deteriorated Part Of Headlight Switch
There’s an issue that often happens in older F150s because of a small worn-out or misaligned part inside the headlight switch.
It’s not the entire switch causing the problem, just a specific plastic part that controls the high beams.
When this part wears or shifts out of place, it keeps the high beams on even when they should be off.
5. Faulty Electrical Modules
In some vehicles, like the 2006 F-150, the headlight switch interacts with other modules, such as the GEM.
A malfunction in these modules could independently keep the headlights on.
6. DRL Issue
A malfunctioning Daytime Running Lights system in a Ford F-150 can cause the headlamps to stay on.
When the DRL components, such as bulbs, harnesses, switches, or relays, don’t work correctly, they might inadvertently signal the headlamps to remain illuminated when they should be off.
7. Automatic Sensor Issue
The headlights staying on even when the vehicle is turned off can often be traced to a faulty automatic sensor under the dashboard’s top section.
This sensor, which detects light conditions to control the headlights, might get wet from spills or leaks, causing it to malfunction and keep the lights on incorrectly.
How To Turn Off Headlights On Ford F150 That Stay On When Tuck Is Off?
Now, let’s get to fixing. We’ll start with the easier stuff first, as always.
1. Correcting Your Truck’s Settings
- Turn the headlight dial to the “Auto” position.
- Access the vehicle’s settings on the center screen.
- Navigate to “Advanced Settings” and select “Lighting.”
- Look for the timer delay setting and modify it to set the desired time for the lights to stay on after turning off the vehicle. Adjust this to your preference for automatic shut-off.
2. Fixing Auto Sensor Issue
- Locate the automatic sensor for the headlight setting under the top dashboard.
- Find the slits cut in the dash’s top indicating its position.
- Pull off the top part of the dashboard to access the sensor.
- Disconnect the sensor to resolve the issue.
This is more of a patchwork fix, but it prevents unnecessary battery drainage and avoids potential issues of being stranded due to a dead battery.
3. Inspecting And Handling Faulty Modules
- Start by disconnecting the ABS module.
- Use diagnostic tools like ForSCAN to identify and disconnect any other problematic modules.
- Look for loose or damaged wires and corrosion, especially in areas connected to the lighting system.
- Try disconnecting and reconnecting the truck’s battery to reset the system.
- Do some tests and see if your lights work correctly.
4. Fixing The High Beams
- Remove the screws beneath the plastic bezel of the steering wheel.
- Disconnect the battery, airbag, and steering wheel to reach the switch.
- Inside the switch, a worn-out plastic nub may be causing the problem. This part controls the activation of the brights.
- Drill holes on either side of the worn-out nub and use self-tapping screws or a tap to secure it.
- Ensure the screws fit properly.
- Put back the switch components, making sure they’re aligned correctly.
- Smooth any rough edges by filing them down.
- Verify the repair by checking if the lights, turn signals, and wipers work properly.
5. Replacing Headlight Switch
- Use a plastic trim tool to gently pry and remove the gray trim piece around the headlight switch by releasing its metal clips.
- Press and unplug the connector attached to the headlight switch.
- Locate the headlight switch tabs (top, bottom, and side) and press them to release the switch.
- Slide out the headlight switch assembly.
- Align the replacement headlight switch with the grooves and slide it in until it clicks securely into place.
- Connect the wiring harness to the new switch until it clicks.
- Properly position the panel and press it back into place, ensuring it fits beneath the gauge cluster trim.
- Verify the new headlight switch’s functionality by testing the headlights to ensure they turn on and off correctly.
You can make use of this video to help you out:
6. Fixing DRL
The DRL system mostly tends to go bad in older F150s. If yours is one from the recent decade, try the headlight switch replacement first if you haven’t.
- Locate the oval panel on the top right of the dashboard. Below it, find the Auxiliary Relay Box 2 (ARB2). Inside, the DRL Relay sits on the far right.
- Check the DRL Relay for damage, loose connections, or corrosion. If it seems faulty, replace it with a compatible new relay for your Ford F-150’s DRL system.
- Place the new DRL Relay securely into the ARB2 slot, ensuring proper connection.
- Start the vehicle to test if the Daytime Running Lights (DRL) are functioning correctly.
- Inspect other DRL parts (bulbs, harnesses, and sockets) for damage, loose connections, or signs of overheating, checking for broken wires, melted sockets, or damaged harnesses using the wiring diagram.
- Replace damaged bulbs or sockets and consider better-quality replacements for damaged harnesses.
- Confirm all connections are secure.
- Reassemble and fit everything back in place, covering the ARB2 with the oval panel.
7. Replacing Dash Wiring Harness
This process is pretty extensive, but I’ve condensed it here.
If you’re not experienced, it might be better to have a mechanic handle this.
- Disconnect the battery.
- Remove the instrument panels and touchscreen.
- Disconnect the steering column.
- Remove the reinforcement beam, dash skin, and wire harness as one unit.
- Position the steering wheel to access the steering shaft bolt.
- Remove the steering shaft bolt and related nuts for safekeeping.
- Label and group male harness connections.
- Take photos for reference.
- Disconnect the center console harness connections.
- Prevent dragging by removing pushpins from the floorboard.
- Locate and access the 13-mm beam bolts near the windshield.
- Transfer components to the new dash.
- Securely attach the new dash skin to the beam.
- Reinstall the dash/beam unit into the cab.
- Use a tool in the designated hole to reconnect the steering shaft bolt.
- Ensure all components function properly.
Final Thoughts
Try these fixes and you can sort out the headlight issue in no time.
With all that done, you can go back to using your F150 without worrying about battery drains.
Good luck with the repairs!