Dealing with malfunctioning rear running lights in your Ford F-150? Been there, done that. Blown fuses, bad bulbs, or messed-up wiring could be the problem.
It’s a common issue among F-150 owners, affecting both older and newer models. But don’t worry.
I’ve found the solutions, which I’ll be sharing in this article. Keep reading for fixes you won’t want to miss.
Why Are Your Ford F150 Rear Running Lights Not Working?
The rear lights on a Ford F-150 might not work because of bad grounding, wiring issues, blown fuses, or dead bulbs and sockets. To fix them, check and repair any damaged wires, make sure the connections to the ground are good, replace any blown fuses, and swap out any bulbs or sockets that are not good.
Let’s take a closer look at all the root causes, and then we’ll move on to the solutions.
1. Grounding Issue
Sometimes, the rear lights on Ford F-150 trucks don’t work because of problems with the ground connection.
This can happen if the connections get rusty, someone messes with the wiring (like when setting up the receiver hitch setup), or the factory connectors get wet and corroded.
Sometimes, the bolts Ford uses for grounding are also too small and break off, causing issues.
When there’s a problem with the ground, the electrical circuits don’t work properly, causing the rear lights, including the turn signals and brake lights, to not function. You may also find that there’s no power to the trailer plug of your f150 due to bad ground.
To figure out what’s wrong, grab a test light and check if electricity is reaching the tail lights.
If not, start checking along the wires until you find where it stops. If there is power, the problem might be bad ground.
2. General Wiring Problem
This one’s obvious, like every other part of the truck, there’s a wiring harness under the hood connecting to the lights.
It’s possible that one or more of the wires broke because of any previous repairs or just wear and tear over time.
You can use wiring diagrams to find issues, as well as go more hands-on and directly trace the wires from the bulb sockets of the lights.
3. Broken Fuses
The tail lights also have their fuses, and they’ll stop working if the fuse is faulty.
Like the wiring issue, you can also use the fuse diagram to find any relevant fuse for your tail lights.
I’ll include some in the fixes, but you might have a different arrangement. It’s always good to double-check.
How do you check if a fuse is blown, you ask? Well, once you find the right fuses, you can do visual checks, and you can also use a multimeter.
4. Bad Bulbs
A busted bulb can mess up your rear running lights too. If one bulb blows, it can mess with the others, causing them to go out as well.
This is because the bulbs in the tail lights do more than one job. They handle running lights, brake lights, and turn signals.
Especially with F150s that use dual filament bulbs, where the running lights share the same filament as the brake light and turn signal.
And because the running lights are on a lot, they tend to burn out first.
Plus, if a bulb isn’t seated properly or if you’re using cheap bulbs (which can be the case if you got your truck secondhand) that aren’t the originals, it can create bad connections in the socket.
This messes with the electrical flow, which can cause problems with your lights.
How To Fix the Rear Tail Lights Of Your Ford F150?
Now, let me show you everything you need to do.
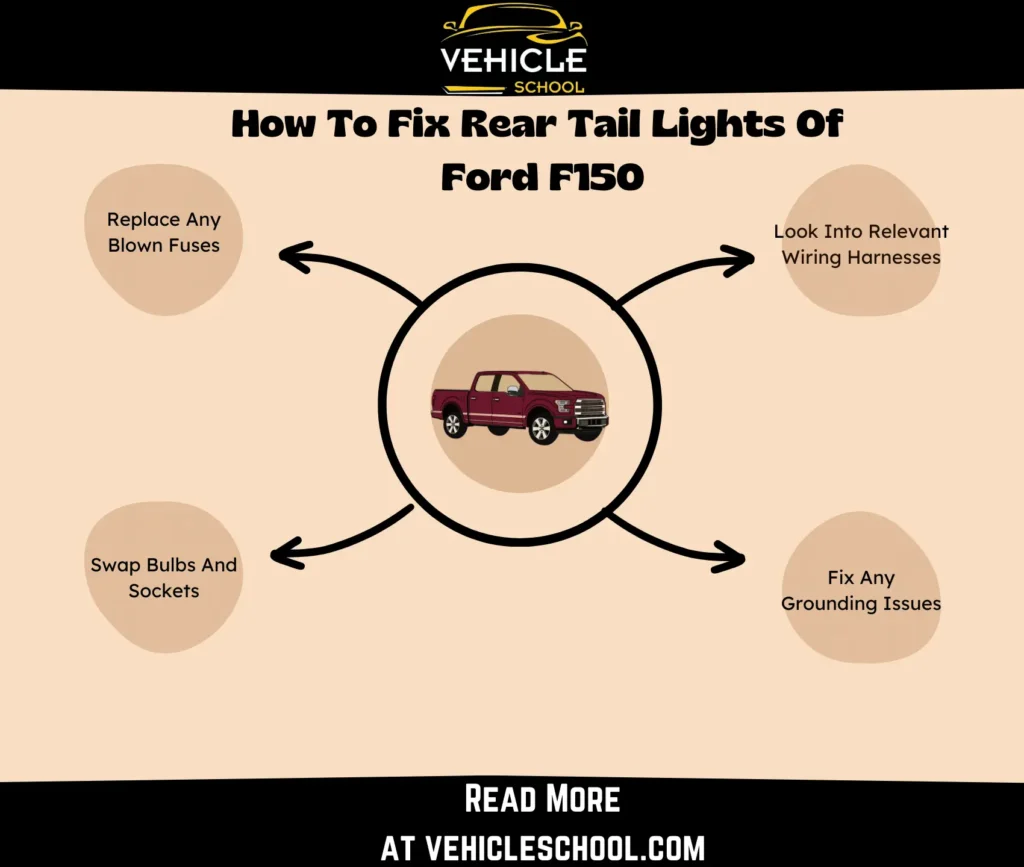
1. Look Into Relevant Wiring Harnesses
- First, disconnect the truck’s battery.
- Find the troublesome wire—the yellow/green stripe one from the tail lights.
- Follow it towards the front of the truck, checking for damage.
- You’ll need to repair any damaged section that is found.
- Strip off any tape or insulation covering the damaged area.
- Cut out the bad part and strip the wire ends.
- Connect a new wire section of the same thickness and color securely.
- Cover the repair with tape or heat-shrink tubing.
- Reconnect the wiring properly.
- Reconnect the truck battery and test your lights.
- Take a drive to make sure everything is working fine.
| Note: If you don’t find any damage, then look at some of the other related harnesses while you’re at it. Pull up your wiring diagram and ensure you’ve looked at connector C405 behind the spare tire. This one’s red and tends to get damaged or corroded easily. Look at C215 as well, which is near the BCM. |
2. Fix Any Grounding Issues
- Check the ground connection near the spare tire for rust or looseness.
- Clean the connections with sandpaper or a wire brush.
- Tighten or reattach the ground wire to the rear frame.
- Use a circuit tester to check if the wires are getting power and if the ground is solid.
- If there’s a hitch, make sure the ground cable is hooked up properly to it.
- Check for any factory-installed bolts or connections that might be broken or rusty.
- If you find a busted bolt, drill it out, clean it, and put in a new one.
- Spray some paint on the repaired spot to prevent rust from forming.
- Test the lights to make sure they’re working again.
3. Replace Any Blown Fuses
- Look for fuses 22, 30, and 40 in the passenger cabin fuse box, which controls tail lights, brake lights, and signal lights.
- Check these fuses to see if any are blown, either visually or with a fuse tester.
- Replace any blown fuses with new ones of the same amperage.
- Use a multimeter to test for power and ground at the tail lamp socket in the back.
- If there’s no power, follow the wire back to the fuse box and check for power along the way.
- If there’s still no power at the fuse box, investigate the interior fuse box or the wiring between the fuse box and the lamps.
- Fix any broken wires or bad connections you find during the inspection.
- Test the lights again to make sure they’re working properly.
4. Swap Bulbs And Sockets
- Park on flat ground and pop open your truck’s tailgate.
- Grab a ratchet and an 8mm socket to unscrew the two bolts holding the tail light in place.
- Pull the light assembly straight back to unclip it from the truck.
- Find the sockets for the running lights inside the assembly.
- Twist each socket to unlock it and pull it out.
- Yank out the old bulbs from the sockets.
- Push the new bulbs firmly into the sockets.
- Twist the sockets back into place inside the tail light assembly.
- Slide the tail light assembly back onto the truck, lining up the clips.
- Screw back in the two bolts you took out earlier.
- If you’re changing both sides, repeat the process on the other side.
- Shut the tailgate.
If you need any help, you can check out this video from O’Reilly Auto Parts.:
FAQ
What to do if the fuse for the rear running lights keeps blowing?
Though less common, shorted or otherwise faulty license plate lights can cause this to happen. Get them replaced, and you’re good to go.
Final Thoughts
If your rear running lights quit working, the stuff I’ve mentioned in this guide is almost definitely the reason.
So, get your safety gear and give these fixes a go, you don’t want to be without those lights for long, as they’re a must-have for driving safely on the road.
That’s all for this post, good luck with the handiwork.