When your F150 shows “Check Fuel Fill Inlet,” it tells you there might be a leak somewhere or a blockage at the fuel fill inlet.
But don’t sweat it immediately; check your gas cap first. If it’s loose or not sealing right, that could be what’s setting off the warning.
Tightening it up might just fix the issue without needing to dig deeper.
If that’s a no-go, then you can read this guide to learn about the other reasons this happens and what fixes you can try.
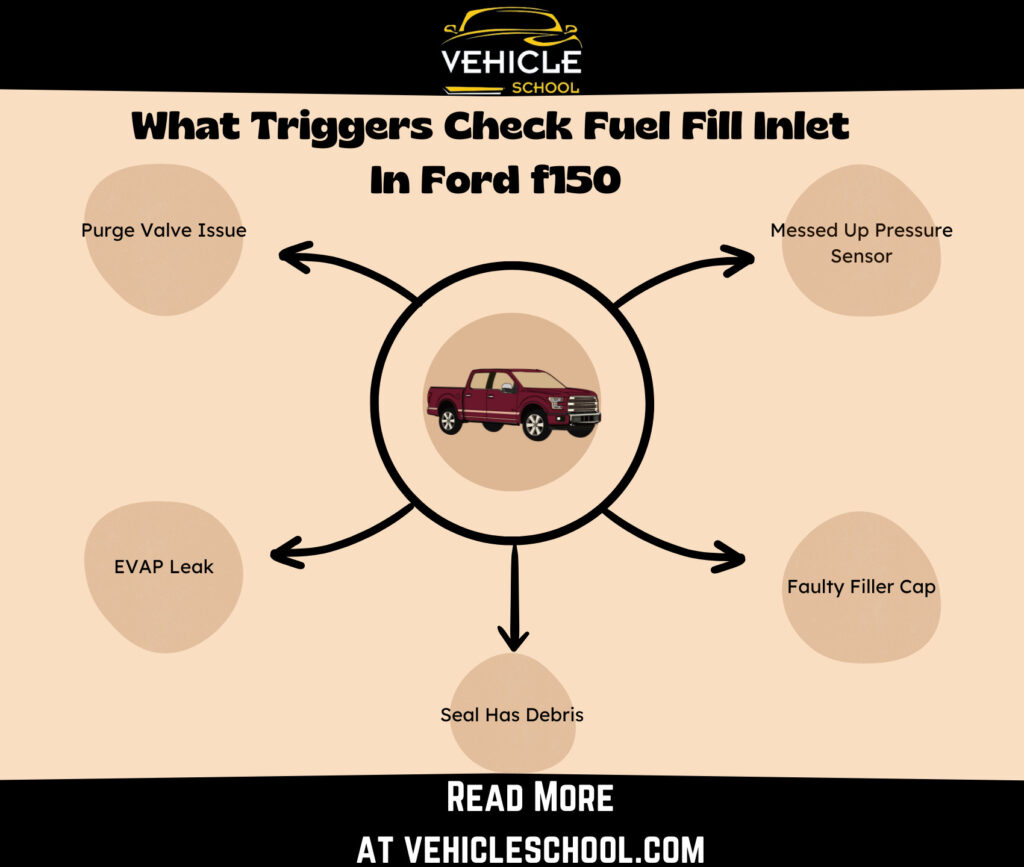
What Triggers Check Fuel Fill Inlet In Ford f150?
There are a lot of reasons for this alert, and it goes beyond just leaks. Let’s take a closer look.
1. Purge Valve Issue
The purge valve in the EVAP system controls how fuel vapors go from the tank to the engine for burning. If this valve gets stuck open or goes bad, it can cause a vacuum leak in the fuel system.
That vacuum can make the plastic fuel tank look sucked in or collapsed.
When you see the alert, take a peek at the bottom of the plastic fuel tank. If it’s deformed, that might mean the purge valve is the cause.
Even other high-end Ford cars like the Fusion and Escape can run into problems with this valve. There’s a TSB for it, though it doesn’t talk about this exact issue.
Basically, if anything in the EVAP system springs a leak or gets a hole, it can trigger the ‘Check Fuel Fill Inlet’ code.
A lot of times, the hiccup also comes from the canister purge solenoid not sealing right during tests. From what I’ve seen, it’s a pretty common reason for that warning.
2. Messed Up Pressure Sensor
Your F-150 includes a sensor monitoring fuel tank pressure. If this sensor malfunctions or provides incorrect readings, the truck may mistakenly interpret it as a loose fuel cap, triggering the “CHECK FUEL FILL INLET” message.
3. EVAP Leak
An EVAP leak occurs when there’s a breach in the sealed system managing fuel vapors in your F-150.
Its role is to prevent fuel vapors from escaping into the air, directing them to the engine for combustion.
If there’s a leak, such as a cracked hose or loose connection, the truck’s system will detect it and display a “check fuel fill inlet” message alerting you to the issue.
4. Faulty Filler Cap
Incorrectly secured or damaged fuel filler caps can lead to issues similar to those caused by debris on the seal.
The cap’s purpose is to create a tight seal, preventing air from entering the fuel system. When it fails to seal properly, air can still infiltrate, potentially triggering a leak alert.
Even with newer Ford models employing the Capless mechanism, minor backpressure leaks can occur, causing persistent alerts and complications during emission tests.
5. Seal Has Debris
When junk or debris gets stuck on the fuel cap seal of your F-150, air sneaks into the fuel tank, altering the vacuum and pressure levels needed for the EVAP system to work correctly.
The “CHECK FUEL FILL INLET” message pops up because the truck senses something’s off with the pressure, and thinks it’s an EVAP leak.
Most Ford vehicles using the Ford Capless System usually show this alert often because of this reason.
How To Fix F150 Check Fuel Fill Inlet Message?
I’ll start with the cheapest fixes first and also add in parts you can fully replace if the easy way doesn’t work.
1. Clean The Fuel Inlet
If you’re lucky, a fix for this alert might just be one cleaning job away. Here’s what you can do.
Ford’s Recommended Method
This is the one that comes included in the F150 Owner’s Manual directly from Ford (Check FUEL AND REFUELING – TROUBLESHOOTING in the provided link).
- When it’s safe, pull over and turn off your engine.
- Put your car in park or neutral.
- Engage the parking brake.
- Open the fuel filler door all the way.
- Take a look at the fuel tank filler valve to make sure there’s no junk blocking it.
- If there’s anything in the way, clear it out.
- Stick the gas pump nozzle or the funnel from your car’s kit into the fuel filler pipe. This should shake loose any debris that’s stopping the valve from closing properly.
- Once you’ve done that, take out the nozzle or funnel.
- Close up the fuel filler door tightly.
The warning message might not go away right away. If it keeps popping up and a warning light comes on, try checking out some of the other fixes.
Alternate Method-1
This is a popular way of cleaning the Fuel Inlet – with the help of some good old WD40.
- Get compressed air, an emergency filler funnel, and WD-40.
- Check Fuel Inlet code (disconnect the battery or hit Reset on the steering wheel).
- Use compressed air to remove debris from the fuel inlet door.
- Insert the emergency funnel into the fuel inlet, and move in and out 10-30 times.
- Spray WD-40 into the fuel inlet, and apply some on threads at the bottom of the filler neck.
- Remove the funnel, and wipe off excess oil or debris.
- Replace the emergency fill cap if needed.
- Insert a threaded object into the filler neck to lock tabs inside.
- Push down firmly to seal the filler neck.
- Ensure the fuel inlet area is clean.
- Check if the Check Fuel Inlet message is gone.
- If not, clear the code again and monitor it for a few days.
If the message returns, you might have to replace the fuel inlet.
Alternate Method-2
- Gather a nylon filler tube (found under the back seat), WD-40, and an air compressor.
- Disconnect the battery to reset that message.
- Push that nylon tube in and out about 40 times.
- Give the fuel inlet area a good spray with WD-40.
- Use the air compressor to blow that area well. Do this a few times and spray more WD-40 each time.
- After all that, clean up the area nicely. Make sure it’s all clean and dry.
- Reconnect the battery – you might also need to reset your radio.
2. Replace Gas Cap
This one is fairly easy – though you might have to make some adjustments to the process based on the make of your truck. However, the overall how-to is still the same:
- Place your thumbs on the screw part of the original gas cap that goes into the fuel filler.
- Squeeze hard with your fingers on the area of the cap where the tether goes all the way around the cap to separate it.
- Remove the original gas cap from the fuel filler neck.
- Take the new locking gas cap and position it over the fuel filler neck.
- Push the tether of the new cap over the bottom part of the filler neck until it goes into the groove.
- Twist the new locking gas cap clockwise to secure it onto the fuel filler neck.
3. Swap The Pressure Sensor
You might have to look into your truck’s workshop servicing manual for this.
The part that needs to be replaced is one of the vapor tubes, called the connecting hose (Part #9C015). You won’t be able to change out the pressure sensor itself – as it’s connected to the hose.
4. Get A New Purge Valve
Of course, take care of all the safety stuff first and disconnect the battery. Once you’ve done that, you can get started:
- Find the EVAP purge valve on the front of the engine.
- Disconnect the electrical connector by pressing down and pulling it off.
- Remove the line by pressing the tabs and pulling it off.
- Use an 8mm socket to loosen and remove the bolts.
- Take out the old valve by wiggling and pulling it away.
- Check the new valve for an O-ring and clear any debris.
- Put in the new valve and tighten the bolts snugly.
- Reconnect the line, making sure the green lock is pushed back.
- Tug at the line to be sure it’s secure.
- Reconnect the electrical connector.
- If you disconnected the battery clamp, reconnect it.
Need some help with the process? Here’s a detailed video you might find handy
FAQ
Is the check fuel fill inlet warning dangerous?
You can keep driving with the check fuel fill inlet warning light on, but it’s not ideal. Ignoring it could lead to fuel leaks or more serious issues later on, forcing you to sink more money into repairs.
Final Thoughts
Hopefully, this clears up the alert for you. If not, you might need a mechanic to check for more leaks in the EVAP system. It’s a bit tricky- and they have the tools to handle it.
DIY fixes should work too, since it’s more often a result of minor Ford design issues. So, go on and give the repairs a try.
When your fuel system is sealed properly with no leaks, you’ll improve f150 gas mileage.
